7 Tips for Changing a Tire on a Three Piece Rim Safely?

Time:2026-10-17 Author:Sophia
0%

Changing a three-piece rim is not ordinary roadside maintenance. It is controlled work involving stored air pressure, heavy components, and sudden separation risks. OSHA’s 29 CFR 1910.177 requires specialized procedures, restraints, training, and equipment for multi-piece rim wheels. Its safety guidance warns that incorrect assembly or inflation can cause fatal injuries. That warning deserves attention.

This introduction explains How to change a tire on a three piece rim safely through seven practical safety principles. It will cover identification, complete deflation, component inspection, correct lubrication, restraint use, controlled inflation, and final checks. The U.S. Tire Manufacturers Association emphasizes manufacturer procedures, approved tools, and trained technicians in its tire-service safety materials. NHTSA’s tire safety reports also connect poor maintenance and tire failure with thousands of crashes annually. Small details matter. A damaged lock ring may look harmless under dusty shop lighting.

Kevin Rohlwing, a recognized tire-service safety educator and former Technical Director of the Tire Industry Association, states: “There is no room for shortcuts when servicing tires and wheels.” That sentence should guide every step. Confidence can become the hazard. Even experienced mechanics may rush after a long shift, skip a pressure check, or trust an unfamiliar rim. I have to challenge that instinct. If the rim design is unclear, stop and consult the manufacturer’s service manual or a qualified specialist. This guide supports safer decisions, but it cannot replace hands-on training, approved restraint equipment, or workplace safety procedures.
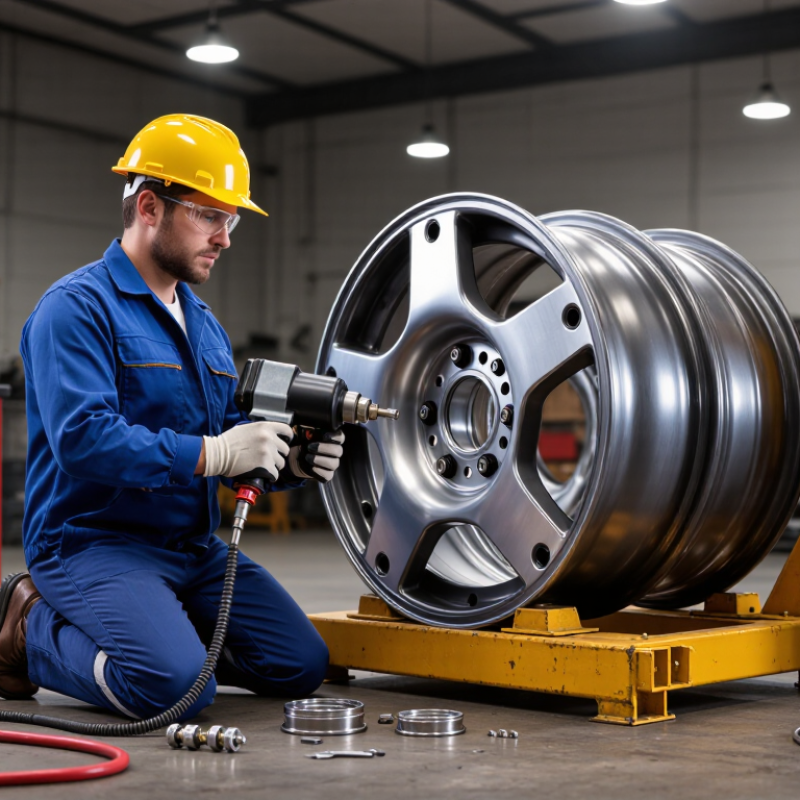
7 Tips for Changing a Tire on a Three Piece Rim Safely?

Identify a Three-Piece Rim Under OSHA 29 CFR 1910.177

7 Tips for Changing a Tire on a Three-Piece Rim Safely

Identify a three-piece rim before touching the tire. Under OSHA 29 CFR 1910.177, multi-piece rims require special handling and trained service personnel.

Look for three separate parts: the rim base, side ring, and lock ring. The lock ring may appear seated, but that does not prove it is secure.

Tip one: confirm the rim design using service information.

Tip two: inspect every ring for cracks, distortion, rust, or missing metal.

Tip three: remove the valve core and release all air before disassembly. Never trust a tire gauge alone. Check again with a calibrated gauge.

Tip four: use a compatible restraining device, such as a safety cage, during inflation.

Tip five: connect a clip-on chuck and remote inflation hose. Stand outside the trajectory zone. A small mistake matters.

Tip six: clean the mating surfaces and check that the lock ring fits evenly around the rim. Do not strike, weld, heat, or force damaged components.

Tip seven: stop when parts resist normal assembly.

I have learned that rushing a ring into place creates false confidence. Recheck the rim, tire, and employer procedures instead.

OSHA also requires appropriate training, equipment, and safe work practices for servicing multi-piece rim wheels.

If the rim’s construction remains uncertain, isolate it and ask a qualified supervisor for verification.

Release All Air and Verify Zero Pressure Before Disassembly

Changing a tire on a three-piece rim requires patience, proper equipment, and strict pressure control. These assemblies can separate violently when stored air remains inside. Work in a clear area with eye protection, gloves, and a rated tire cage. Use a stable lifting method, and ask a trained technician for help if the rim is damaged or unfamiliar.

Release all air before loosening any nuts, clamps, or locking components. Remove the valve core with a suitable tool, then wait until airflow completely stops. Check the pressure with a reliable gauge. It must read zero. Press the valve stem briefly, because a blocked valve can give a false reading. Check both the tire cavity and any chamber that may hold trapped air. Never rely on sound alone. Small pressure can still be dangerous.

Keep your body away from the rim’s possible travel path. Inspect the rim, side ring, lock ring, valve, and tire bead for cracks, bends, corrosion, or missing parts. Do not hammer a ring while pressure exists. Use manufacturer-approved procedures and a remote inflation device when reassembling. Inflate gradually inside the safety cage, stopping immediately if the tire shifts or a ring moves. I have seen people hurry after hearing no airflow, but that shortcut is exactly where judgment can fail. Recheck zero pressure before every disassembly step, even when the tire appears completely flat.

7 Tips for Changing a Tire on a Three Piece Rim Safely — Release All Air and Verify Zero Pressure Before Disassembly
Tip Safety Area Recommended Action Verification Before Proceeding Why It Matters
1 Prepare a controlled work area Park on a firm, level surface away from traffic, apply the parking brake, secure the vehicle against movement, and use suitable lighting. The vehicle is stable, the work area is clear, and required tools are within reach. A stable work area reduces the risk of vehicle movement, dropped components, and incorrect assembly.
2 Inspect the three-piece rim Identify the rim components, including the wheel halves, lock ring or retaining components, bead areas, valve assembly, and visible damage or corrosion. The rim type and component arrangement are understood before any fastener or retaining part is disturbed. Three-piece rims can contain multiple parts that must be reassembled in the correct order and orientation.
3 Release all air Remove the valve core or use an appropriate deflation method. Stand clear of the valve opening and allow the tire to deflate completely. No air escapes when the valve is checked, and the tire is visibly relaxed rather than loaded against the rim. Trapped air can store substantial energy and may cause components to separate violently during disassembly.
4 Verify zero pressure Use a properly functioning pressure gauge to confirm zero pressure. Check the valve passage again after removing the valve core. The gauge reads 0 pressure and no additional air is released when the valve is tested. Never rely only on the tire's appearance; a tire can look deflated while pressure remains trapped inside.
5 Use appropriate personal protection Wear safety glasses, protective gloves, and sturdy footwear. Keep hands and body parts away from bead edges, retaining components, and pinch points. Protective equipment is worn and the planned tool positions do not place anyone in the potential release path. Rim parts, tools, and damaged tire components can create sharp edges, pinch hazards, or flying debris.
6 Disassemble gradually and inspect parts Follow the rim manufacturer's service procedure, use suitable non-damaging tools, and loosen or remove components in a controlled sequence. Do not strike pressurized or stuck parts. Every component is identified, undamaged, clean, and free from excessive corrosion, distortion, or cracks before reuse. Correct sequencing helps prevent component ejection and reveals damage that could compromise the replacement tire or rim.
7 Reassemble and inflate safely Install the tire and rim components in the correct orientation, lubricate the bead only with an approved product, and inflate using a remote air line or safety cage when applicable. The assembly is inspected, the valve is secure, the bead is seated evenly, and inflation is stopped at the specified pressure. Controlled inflation reduces exposure to stored energy and helps prevent bead damage, leaks, and component separation.
Important: If the rim is damaged, heavily corroded, incorrectly identified, or lacks a reliable service procedure, stop work and have it inspected by a qualified tire professional. Never disassemble a multi-piece rim while any pressure remains.

Inspect the Lock Ring, O-Ring, and Rim Parts for Damage

Changing a tire on a three-piece rim demands patience, not force. Deflate the tire completely and remove the valve core before disassembly. A trapped air pocket can release violently. Use a safety cage, remote inflation equipment, and suitable protective gear. If you lack training, stop and ask a qualified technician for help.

Inspect the lock ring closely for cracks, distortion, heavy rust, or sharp burrs. It must sit evenly in its groove, with no lifted section. Examine the O-ring for cuts, flattening, hardening, or dirt.

Replace damaged O-rings; reusing one often causes slow leaks. Apply only the approved lubricant, and keep the sealing groove clean and dry when required by the service procedure.

Check every rim part under bright light. Look for hairline cracks around the flange, bead seat, bolt holes, and welded areas. Even a small dent can prevent proper seating. Clean corrosion carefully, but do not grind away structural metal.

I once focused too much on the tire and nearly missed a bent rim edge. That mistake changed my inspection routine. I now rotate each part slowly and run a clean fingertip along accessible edges. Stop immediately if anything feels sharp, loose, or uneven.

Reassemble according to the service manual, then inflate gradually from a safe position. Never strike a pressurized lock ring. Never stand in its escape path.

Use OSHA-Compliant Restraint Devices and Remote Inflation Controls

Changing a Tire on a Three-Piece Rim Safely

A three-piece rim stores dangerous energy when pressurized. Use an OSHA-compliant restraint device before removing or installing tire components. Choose equipment rated for the rim assembly. Inspect it for cracks, bent parts, and missing pins. Keep the rim inside the restraint during inflation. Never rely on memory or a quick visual check alone.

Deflate the tire completely and remove the valve core before breaking the bead. Confirm zero pressure with a reliable gauge. Clean the rim, then inspect the lock ring, side ring, and mating surfaces. Keep hands away from pinch points. Use proper lifting equipment for heavy assemblies. Secure the wheel so it cannot roll or shift. A small alignment error can create a serious hazard.

Inflate with remote inflation controls from outside the danger zone. Stand clear of the trajectory path. Use a clip-on chuck with a long hose. Increase pressure in short stages. Check that the components seat evenly. Stop if the ring moves, the tire bulges, or unusual sounds appear. Follow service limits and site procedures. Training matters, but overconfidence remains a weakness. Pause when conditions differ from practice.

Reassemble to Manufacturer Specifications and Inflate from a Safe Position

Changing a tire on a three-piece rim demands patience, correct tools, and respect for stored air pressure. The rim components can separate violently if assembled incorrectly. Wear eye protection, safety footwear, and suitable gloves. Inspect the rim, bolts, O-rings, and tire for cracks, corrosion, cuts, or distortion. Do not continue with damaged parts.

Clean every mating surface before reassembly. Replace damaged sealing rings instead of stretching or reusing them. Position each rim section exactly as the manufacturer specifies. Tighten fasteners in the required sequence, using a calibrated torque wrench. The correct torque matters. Too little can cause leaks or separation. Too much can damage threads or distort the rim. I once assumed a visually tight assembly was safe; that judgment was not enough. Always verify the service manual and check the final torque twice.

Inflate only inside an approved safety cage or with the restraint system required for that rim. Use a clip-on air chuck, a functioning pressure gauge, and a hose long enough to keep your body away from the trajectory zone. Stand to the side, never over the rim or directly in front of it. Add air gradually, pausing to inspect bead seating and listen for leaks. Stop immediately if the rim shifts, a seal pinches, or unusual sounds appear. Never exceed the specified inflation pressure. Rushing this stage is an avoidable mistake.

FAQS

What should I do before disassembling a three-piece rim?

Deflate the tire completely. Remove the valve core. Confirm zero pressure with a reliable gauge. Use a restraint device and protective equipment. Stop if you lack proper training.

Why is a restraint device necessary?

Pressurized rim parts can separate violently. Keep the assembly inside a correctly rated restraint device. Inspect pins, bars, and welds before use. Never trust a quick glance.

How should I inspect the lock ring?

Look for cracks, distortion, heavy rust, and sharp burrs. The ring must sit evenly inside its groove. Stop if any section appears lifted or loose. Never strike a pressurized ring.

What defects can affect an O-ring?

Check for cuts, flattening, hardening, dirt, or deformation. Replace damaged sealing rings. Do not stretch or reuse questionable parts. A tiny defect can cause a slow leak.

Which rim areas need close inspection?

Examine the flange, bead seat, bolt holes, welded areas, and mating surfaces. Use bright light. Rotate each part slowly. Even a small dent can prevent proper seating.

How should damaged or corroded rim parts be handled?

Clean corrosion carefully. Do not grind away structural metal. Stop if an edge feels sharp, loose, or uneven. I once missed a bent rim edge. That changed my inspection routine.

How should the rim be reassembled?

Follow the service manual exactly. Clean every mating surface. Position each section correctly. Tighten fasteners in the required sequence. Use a calibrated torque wrench. Check the final torque twice.

How can I inflate the assembly more safely?

Use remote inflation controls and a long hose. Attach a clip-on chuck. Inflate in short stages. Stand beside the trajectory path, never over the rim. Stop if the ring shifts, the tire bulges, or strange sounds appear. Rushing is avoidable.

Conclusion

How to change a tire on a three piece rim safely requires careful identification, preparation, and controlled handling. First, determine whether the wheel is a three-piece rim and follow the applicable OSHA requirements for multi-piece and single-piece rim wheels. Before removing any components, completely release the air and confirm zero pressure with a reliable gauge. Never assume a tire is deflated simply because it appears flat.

Next, inspect the lock ring, O-ring, side ring, and other rim parts for cracks, bending, corrosion, or wear, replacing damaged components as needed. Use a properly rated restraint device and remote inflation controls during assembly and inflation, keeping everyone out of the danger zone. Reassemble the rim according to the manufacturer’s specifications, ensuring each part is seated correctly. Inflate gradually from a safe position while monitoring the assembly, and stop immediately if movement, leakage, or unusual distortion occurs. Careful inspection and disciplined procedures are essential to reduce the risk of serious injury.

Sophia

Sophia

Sophia is a dedicated marketing professional with an exceptional depth of knowledge about her company's products and services. With a keen understanding of market trends and customer needs, she crafts insightful blog posts that not only inform but also engage readers, enriching the company’s online......